
Coffee Cup Menu & Procurement Guide
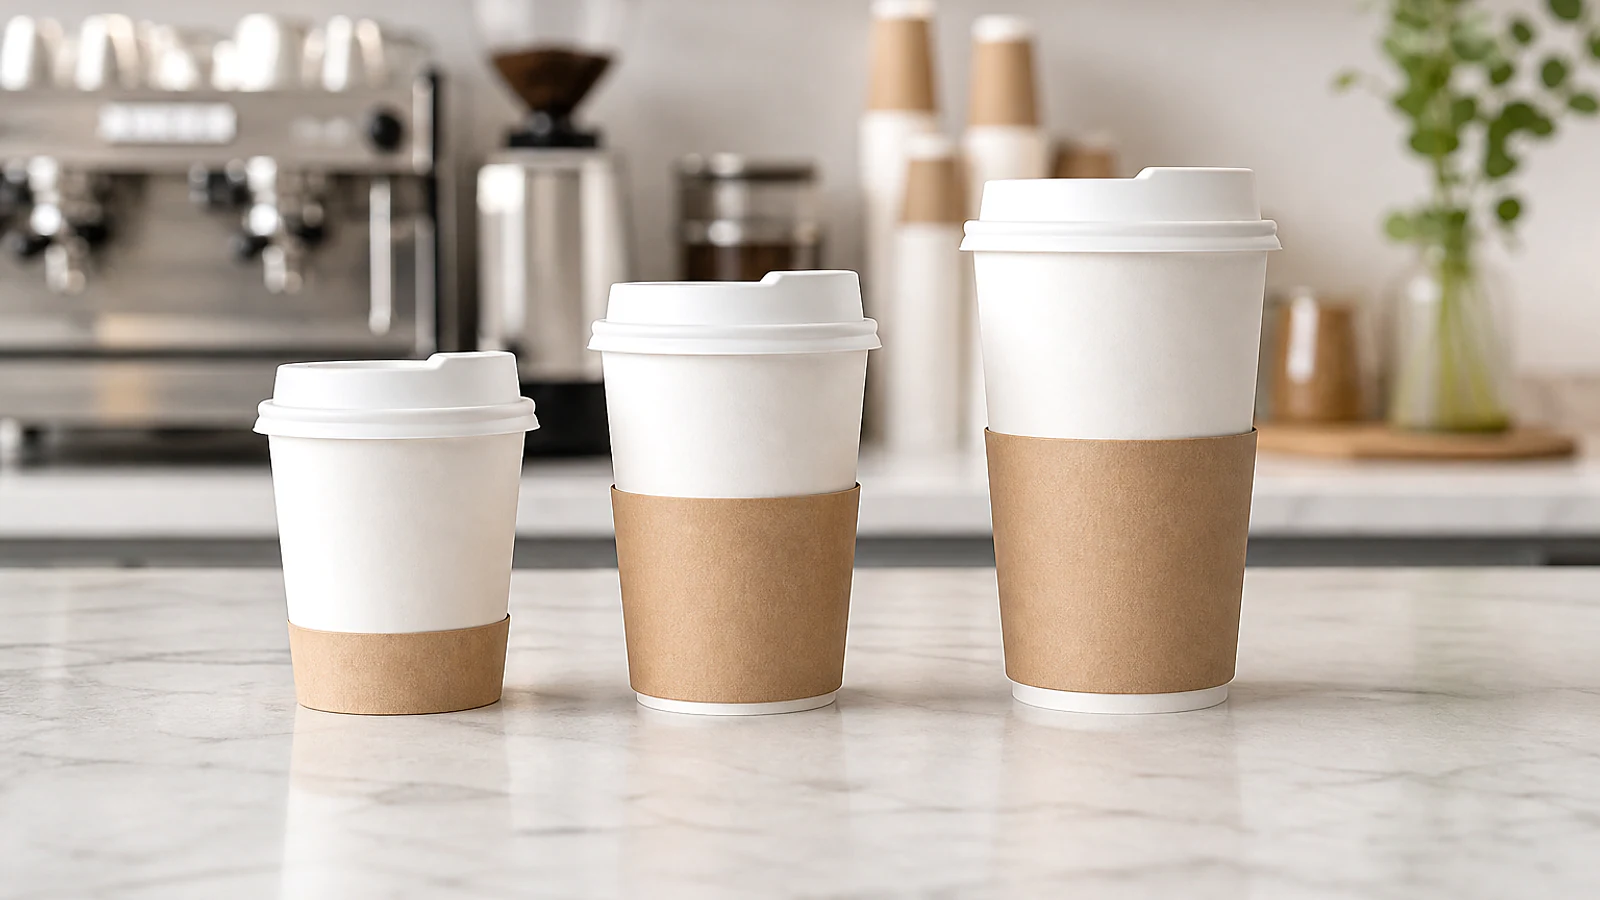
8 oz, 12 oz & 16 oz Coffee Cups: Buyer’s Menu & Lid Guide
Cup size changes more than drink volume. It changes recipe balance, customer choice, lid and sleeve inventory, carton storage, menu pricing and the consistency of every takeaway order.
8 oz, 12 oz and 16 oz in millilitres
| Nominal size | U.S. fluid ounces | Approximate metric volume | Buyer starting point |
|---|---|---|---|
| 8 oz | 8 U.S. fl oz | 237 mL | Compact drink, tasting or recipe that benefits from a smaller milk or water volume. |
| 12 oz | 12 U.S. fl oz | 355 mL | Medium takeaway format for recipes and markets where this is the core size. |
| 16 oz | 16 U.S. fl oz | 473 mL | Larger drink with corresponding recipe, price, handling and inventory implications. |
These conversions describe reference capacity, not a guaranteed service fill. The cup needs headspace for foam, milk movement, ice, syrup, closing and drinking. State both fluid ounces and millilitres on international specifications and distinguish fluid volume from ounces by weight.
Nominal capacity is not the finished drink volume
A supplier can identify a cup as 12 oz using a defined capacity method, but a café may safely serve less after allowing for the lid and transport. Brimful measurement, nominal volume and usable fill should not be treated as the same number. Ask how the capacity was measured and establish a menu fill line with the real drink.
Measure espresso, water, milk, foam, syrup, toppings and ice as the recipe requires. Assemble the lid and inspect clearance. The selected fill should stay consistent when different staff prepare the same order and should remain stable through the normal handover or delivery route.
Build the menu before choosing cup sizes
List every beverage, its ingredients, target serving volume, temperature and selling price. A small filter coffee, cappuccino, flat white, latte, tea and hot chocolate do not automatically belong in the same cup merely because local menus label them “small.” Each recipe has its own balance and customer expectation.
Decide whether a larger size adds espresso, adds only milk or water, changes syrup, or creates a different product. If a drink is simply diluted into a larger cup, flavor and perceived value can shift. Package buyers should therefore confirm the recipe matrix with operations before ordering a full size family.
Practical roles for 8 oz, 12 oz and 16 oz
8 oz
Useful for compact espresso-based recipes, smaller hot drinks, tastings, office service or markets that prefer moderate portions. Confirm whether the smaller cup requires its own lid and sleeve.
12 oz
Often chosen as a core medium cup for coffee, tea and milk-based drinks. Test the actual recipe and decide whether it can share a lid family with the large size.
16 oz
Supports larger takeaway drinks, but increases liquid weight, ingredient cost and carton footprint. Check grip, carrier, sleeve, lid and delivery stability before adding it to the menu.
These are planning roles, not universal drink standards. Regional habits, recipe philosophy, customer demand and service channel should control the final range.
Use the smallest size range that covers the menu
Every additional cup size creates a base SKU, possible lid SKU, possible sleeve SKU, artwork version, carton location and reorder point. A three-size menu may be justified by demand; a two-size menu may be more efficient for a smaller operation. Use sales data and recipe coverage to decide.
Run a menu-to-packaging matrix. For each drink, record allowed size, cup SKU, lid SKU, sleeve requirement, fill line and monthly demand. Identify slow combinations and confirm that customers understand size names. Reducing unnecessary variants can lower picking errors without forcing unsuitable recipes into one cup.
Cup geometry affects more than capacity
Top diameter, bottom diameter, height and wall taper create the physical volume. Two cups carrying the same ounce label can have different profiles. A tall, narrow cup and a wider, shorter cup can behave differently in barista handling, automatic dispensers, cup holders, sleeves, carriers, carton packing and visual presentation.
Request a drawing or specification sheet. Record finished top outside diameter at the rim, bottom diameter, height, rim curl and allowed tolerance. Check the assembled height with the lid. Test nesting and release at the workstation, because cups that stick or release in pairs slow service and increase waste.
Rim diameter and lid family
Ounce size does not define the lid. Some 12 oz and 16 oz cups share a rim family; other supplier ranges use different diameters or curl geometry. An 8 oz cup may have a smaller rim, but this also varies. Build the purchase specification around exact item codes and measured fit.
Use the coffee cup and lid fit guide to check seating force, full-rim engagement, hot-drink performance, batch consistency and replacement control. Link every approved cup to a named coffee cup lid and retain an assembled golden sample.
Single-wall, double-wall or ripple-wall
Single-wall cups use one formed paper wall and can suit applications where temperature, hold time and hand comfort are controlled. A separate sleeve may be part of the approved system for hotter drinks. Double-wall cups add an outer layer that changes insulation, stiffness, print surface and carton volume. Ripple-wall cups add a textured outer profile with another balance of grip, insulation and branding.
Do not select wall type from appearance alone. Fill each candidate with the actual drink, use the intended lid, and measure customer handling after the normal wait. Compare cup temperature, stiffness, seam behavior, grip, sleeve need, print quality, storage and landed cost.
When a cup sleeve belongs in the system
A paper cup sleeve can improve hand comfort and add branding, but it creates another SKU and assembly step. Test sleeve size against each cup profile. A sleeve that fits a 12 oz cup may sit differently on a 16 oz cup even if the rims share a lid.
Observe whether the sleeve slides, covers important printing, interferes with a cup holder or slows the barista. Compare the total cup-plus-sleeve cost and storage requirement with an insulated cup alternative. If sleeves are used only for selected drinks, define that rule on the recipe card.
Hot-drink test for each size
- Prepare the real recipe at the normal service temperature and record the fill line.
- Apply the exact approved lid using the normal staff motion and inspect full seating.
- Hold the cup at the expected handover time and assess stiffness, grip and external heat.
- Place it in the intended carrier or bag and run the common walking or delivery route.
- Inspect rim leakage, lid lift, seam seepage, base softness, deformation and drinking comfort.
- Repeat across multiple cups and production-representative samples before approval.
Use safe handling and do not invert hot beverages. A realistic controlled route provides better evidence than an unsafe demonstration.
Cold and iced drink considerations
If paper cups are proposed for iced service, test the exact construction rather than assuming that a hot-cup specification covers cold use. Ice adds impact and weight; condensation can affect grip, print and outer paper; longer hold times can challenge stiffness. The lid style and straw or sip opening also change.
Compare usable volume after ice is added. A 16 oz cup filled with ice does not deliver 16 fluid ounces of beverage. Define the recipe, ice scoop, top-up line and lid clearance. For operations primarily serving cold drinks, compare the relevant cold drink cup options before standardizing one material across every beverage.
Recipe economics and menu pricing
Changing from 12 oz to 16 oz affects milk, coffee, syrup, lid, cup and sometimes sleeve cost. Calculate the full recipe and packaging cost by size. Confirm whether the selling-price step covers the ingredient increase, packaging change, waste and additional handling.
Track actual sales mix. A large cup can raise average transaction value, but it can also increase ingredient use or slow service if the recipe and steaming workflow are not designed for it. A small cup can strengthen drink balance, but customers must understand its value. Packaging should support the menu strategy rather than silently determine it.
Inventory and carton-ratio planning
Record pieces per sleeve, sleeves per carton, carton dimensions, gross weight and pallet configuration for every cup, lid and sleeve. Cases may contain different quantities. Ordering one carton of each component can create an imbalance even when every drink uses one cup and one lid.
Calculate weekly demand and safety stock by SKU. If 12 oz and 16 oz share one verified lid, combine their expected lid demand while keeping base forecasts separate. Protect rims from crushing and dust. Use clear shelf labels so staff do not mix similar sizes or old and new lid families.
Printing and size identification
Use the final formed-cup template, not a generic rectangle. Keep important logos and small text away from the side seam, bottom curve and areas distorted by taper. Confirm ink, coating, color target, registration and the appearance of the artwork after cup formation.
Make sizes easy to identify during a rush. A discrete color band, printed size code or stock-location label can reduce errors. If the same artwork appears on all sizes, retain a version-controlled die-line for each one. Review the custom printed coffee cups route for product specifications and sampling.
Food-contact and material evidence
Confirm base paper, barrier or coating, adhesive, inks and any outer wrap relevant to the construction. Request the declarations or test documents needed for the intended drink, temperature and destination market. Match evidence to the exact finished item; a generic paper certificate does not describe every coating and print combination.
The food-grade paper compliance checklist explains how to connect documents, intended use and change control. Avoid making recycling, compostability or plastic-free claims unless evidence supports the whole finished cup in the buyer’s market.
MOQ, samples and landed cost
Ask for MOQ by size, wall type, print design and lid combination. A stock plain cup MOQ does not establish the MOQ for a custom printed 8/12/16 oz family. Separate tooling, plates, structural samples and printed proofs from recurring unit cost. Confirm overrun or underrun and production lead time.
Compare landed cost per served drink, including cups, lids, sleeves, freight, storage, damage and obsolete inventory. A low unit price can be offset by an extra lid family or excessive carton volume. Approve structure first, then artwork, then a production-representative sample when color and fit are critical.
Drive-through, carrier and delivery load
A 16 oz filled drink is heavier and often taller than an 8 oz drink, so size changes can alter the centre of gravity in a carrier or vehicle cup holder. Test mixed-size orders rather than only single cups. Place the actual cups, lids, sleeves and straws in the intended carrier, then run the normal counter handoff, walking route, turns, braking and delivery-bag loading.
Inspect cup tilt, lid contact, carrier fit, sleeve movement and whether the customer can identify each drink without lifting every cup. For multi-drink orders, verify that the carrier openings support both the smallest base and the largest filled cup. If inserts or plugs are required, include them in the packaging SKU and carton-ratio plan instead of treating them as an informal service fix.
Approve samples in controlled stages
Use a plain structural sample to confirm capacity, rim fit, wall type, dispenser release and sleeve compatibility. After the structure is frozen, approve a printed sample or color proof for logo position, small text and size identification. Before a major order, compare a production-representative sample with the signed specification and assembled golden set.
Record pass, revise or reject for each checkpoint. Photos should show the fill line, full lid seating, side seam, base, sleeve position and final artwork. Give the supplier item-specific feedback rather than a general statement that the cup “looks good.” Controlled stages prevent a late structural change from invalidating approved artwork or a print approval from hiding an unresolved lid problem.
Receiving inspection and menu change control
At receiving, verify carton item codes, quantities, rim dimensions, nesting, roundness, print, odor, contamination and visible damage. Assemble sample cups with their approved lids and repeat a short hot-fill check when a new lot or supplier revision arrives. Quarantine mismatched inventory before it reaches the bar.
Require written approval for changes to dimensions, rim tooling, paper, coating, adhesive, print, wall construction, lid series or production location. If the café changes a recipe or size name, update recipe cards, point-of-sale descriptions, fill lines, packaging codes and staff training together.
RFQ checklist for an 8/12/16 oz coffee-cup program
- Drink list, recipe by size, service temperature and usable fill.
- Required capacity in U.S. fl oz and mL.
- Top diameter, bottom diameter, height, rim profile and tolerance.
- Exact cup SKU, lid SKU, lid type and sleeve requirement by size.
- Single-wall, double-wall or ripple-wall construction and coating preference.
- Hot, cold or dual-use test requirements and delivery route.
- Food-contact and destination-market documents.
- Print colors, artwork revision, size identification and finish.
- Quantity and forecast by size, MOQ, sleeve and carton configuration.
- Destination, requested sample stage and delivery schedule.
Send this information through the coffee-cup RFQ form. Buyers can also review the complete coffee shop packaging solution and cups and bowls range.
Frequently asked questions
How many millilitres are in 8 oz, 12 oz and 16 oz coffee cups?
Using U.S. fluid ounces, the reference volumes are about 237 mL, 355 mL and 473 mL. A cup’s safe service fill can be lower because the drink needs headspace and lid clearance.
Do 12 oz and 16 oz coffee cups always use the same lid?
No. They can share a lid only when both cups belong to the same verified rim family. Match the exact cup SKU and rim specification to the exact lid SKU, then test the assembled combination.
Which cup size should a café use for cappuccino or latte?
There is no universal menu rule. Define the espresso, milk, foam, syrup and headspace for each recipe, then choose the smallest cup that delivers the intended drink and customer experience consistently.
Is the printed ounce size the usable fill line?
Not automatically. The ounce name is a nominal capacity. Measure the real drink at service temperature and leave enough room for closing, carrying and drinking through the lid.
When should a café choose single-wall or double-wall cups?
Choose after testing drink temperature, hold time, hand comfort, sleeve use, print goals and cost. Single-wall cups may use a sleeve for hotter drinks; double-wall and ripple-wall structures provide different insulation and presentation options.
Can the same cup be used for hot coffee and iced drinks?
Only when the exact cup construction is specified and tested for both uses. Cold service adds condensation and ice load, while hot service adds heat, steam and hand-comfort requirements.
What belongs in a custom coffee-cup RFQ?
Include drink recipes, usable fill, sizes, top and bottom dimensions, cup and lid SKUs, wall structure, coating, service temperature, sleeves, printing, quantity by size, carton ratios, destination and sample requirements.
Turn the coffee menu into a controlled cup specification
Share the recipes, sizes, usable fills, cup and lid requirements, wall structure, printing, quantity by size and destination. GLY PACKAGING can help narrow the program and prepare a sample-testing route.